You already know your model is only as good as its training data. But when you start looking at data collection for computer vision, the choices can quickly get overwhelming. Do you need LiDAR, radar, or will a simple RGB camera do the job? Should you buy real-world data or generate it synthetically? How do you make sure the data you collect actually solves your problem rather than creating new ones?
This article cuts through the complexity to give you a practical framework for collecting visual data that works.
Think of data collection as a recipe for a complex dish. The ingredients are your images, point clouds, and sensor readings. But having great ingredients isn’t enough—you need to know how to combine them, in what proportions, and what to do when you can’t find exactly what you need. We’ll walk through the sensors you can use, how to capture data from each one, the options for sourcing images, and the traps that waste time and money. And if you’re looking for a deeper dive on the subject, this guide on data collection offers additional perspectives on best practices. By the end, you’ll have a clear roadmap for your next data collection effort.
The Sensor Suite: Matching Hardware to Your Needs
Before you spend money on hardware, understand what each sensor brings to the table.
Think of it like a team—each member has specific strengths and weaknesses.
Cameras are the workhorses of computer vision, delivering rich visual information at a relatively low cost.
But they have a dirty secret: they fail when lighting gets tricky or objects obstruct the view.
That’s where active sensors come in.
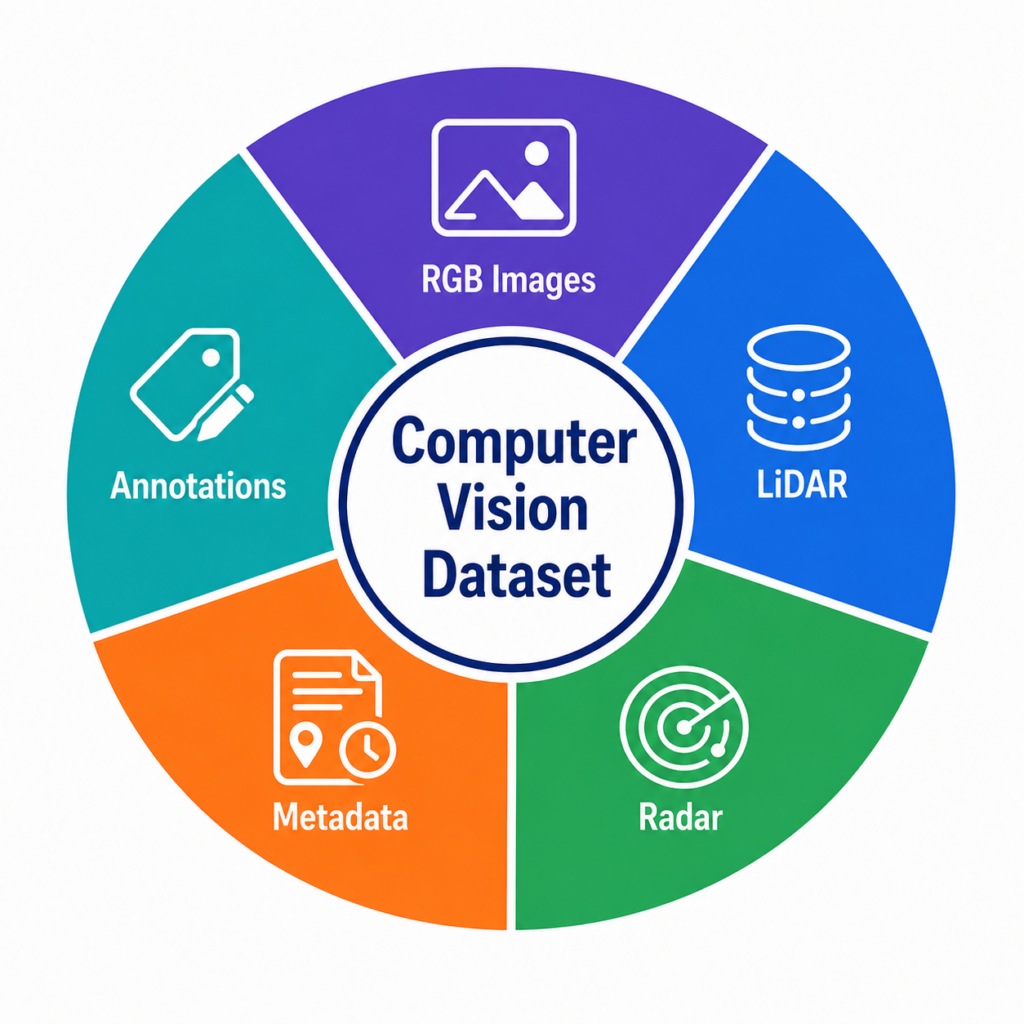
Figure 1. Core components of a modern computer vision dataset.
Cameras: The Visual Foundation
Standard RGB cameras capture what humans see—color, texture, and context. They’re cheap, widely available, and produce data that’s intuitive to label. But the range of cameras available can be overwhelming. For autonomous driving research, researchers at Michigan State University used three FLIR cameras running at 34 frames per second with 2048×1536 resolution to maximize front-facing field of view without the distortion that comes with fisheye lenses. In industrial settings, you might use high-speed cameras from manufacturers like Lucid Vision Labs.
What to consider when choosing a camera:
- Resolution vs. frame rate: Higher resolution gives you finer detail, but often at the cost of slower capture speed. For fast-moving objects, prioritize frame rate.
- Field of view: Wide-angle lenses capture more of the scene but introduce distortion. Narrower lenses give cleaner data.
- Lighting conditions: Cameras struggle in low light, rain, or fog. If your deployment environment has these conditions, you need to plan for it.
LiDAR: Depth Measurement with Precision
LiDAR works by firing laser pulses and measuring their return time. The result is a 3D point cloud that gives you precise distance measurements to objects in the scene. LiDAR doesn’t care about lighting—it works just as well at midnight as at noon. But it’s expensive. A 64-line LiDAR like the Ouster OS-1 can cost tens of thousands of dollars.
Types of LiDAR:
- Mechanical spinning LiDAR: These units physically rotate to create a 360-degree view. The Velodyne VLP-32 is a common choice and provides 32 laser beams.
- Solid-state LiDAR: These have no moving parts, making them more reliable and cheaper. They typically have a narrower field of view.
- FMCW LiDAR: Frequency Modulated Continuous Wave LiDAR doesn’t just measure distance—it can also measure velocity. These are becoming more common, with some research vehicles now carrying them.
The LiDAR gotcha:
In wet conditions, LiDAR can produce artifacts like “dead zones” where the laser can’t see through rain, and reflections off surfaces can create false readings. This is critical to understand because many datasets are collected on sunny days and then fail when deployed in the rain.
Radar: Weather-Resistant but Low-Resolution
Radar operates at much longer wavelengths than LiDAR, which means it penetrates fog, rain, and snow with relative ease. It’s also cheaper.
The tradeoff? Much lower resolution.
Radar can tell you something is there and roughly how fast it’s moving, but it can’t tell you what it looks like.
What radar excels at:
- Weather resilience
- Velocity measurement (Doppler radar)
- Long range detection
What radar struggles with:
- Object classification
- Fine detail perception
- Precise positioning
Modern “4D imaging radar” systems are changing this picture by adding elevation data and higher resolution. In the Viking Hill dataset for forest environments, researchers found that radar achieved competitive performance on ground and canopy segmentation—even matching LiDAR in some cases—though it lagged on tree trunks (56% IoU vs 74% for LiDAR).
Sensor Fusion: The Power of Combining Modalities
No single sensor is perfect.
The magic happens when you combine them.
The jbX platform from a recent research project carries 18 sensors total: eight 4K cameras, four LiDAR units, four 4D imaging radars, plus GPS and IMU. This setup generates over 4.3 gigabytes of raw data per second—nearly 1 terabyte per hour.
Why go to this extreme?
Because the combination of sensors provides redundancy and complementary information.
- The cameras handle object recognition.
- LiDAR provides precise positioning.
- Radar gives you all-weather reliability.
The research vehicle described in one dataset combined 64-line and 32-line LiDAR, six radars, and three cameras to capture approximately 150 degrees of front-facing imagery.
Key consideration:
If you’re fusing data from multiple sensors, timing is critical. Your camera might capture a frame at a slightly different time than your LiDAR. If the vehicle is moving, this creates alignment errors. The solution is GPS-synchronized clocks using Precision Time Protocol (PTP), which can achieve synchronization within microseconds.
The Collection Pipeline: From Raw Data to Usable Dataset
Collecting data is only half the battle.
You also need to process it into a format your model can learn from.
Calibration
Before you collect a single frame, calibrate your sensors.
This means:
- Intrinsic calibration: Understanding each camera’s internal parameters (focal length, optical center, distortion).This is typically done using chessboard patterns.
- Extrinsic calibration: Knowing the precise position and orientation of each sensor relative to the vehicle. This is often done by measuring physical positions and then fine-tuning with software registration.
- Temporal calibration: Ensuring all sensors are time-synchronized. One approach is to define a central reference sensor (often the LiDAR) and timestamp all other data relative to it.
Synchronization
The jbX platform uses IEEE 802.1AS time synchronization for network-wide precision timing.
In simpler setups, GPS time synchronization is standard.
For the MSU dataset, cameras and LiDAR units supported Precision Time Protocol (PTP), while other sensors used software timestamps recorded when packets were received.
They verified that the difference between device timestamp and packet receive timestamp averaged just 63 nanoseconds—negligible.
Data Storage
At scale, data storage becomes a major challenge.
The jbX platform produces roughly 1 TB per hour.
Storage decisions affect:
- Format: ROS bag is common for robotics, but MCAP (which bypasses DDS) can improve performance.
- Compression: Optional but speeds up data transfer.
- Organization: Frame-aligned data where all sensors share the same timestamp is easier to work with.
Annotation
Labeling is often the most time-consuming and expensive part of data collection.
For 3D data, manual annotation is done by trained personnel using specialized tools.
Teams are increasingly using automated or semi-automated annotation:
- Model-assisted labeling: Label some data, train a model, use it to pre-label more data, then review and correct.
- Synthetic ground truth: In CARLA, you get perfect labels automatically.
- Active learning: Use model uncertainty to prioritize the most valuable data for manual labeling.
Practical Strategies for Better Data Collection
Now let’s get into the actionable advice.
1. Start Small and Scale Up
Don’t launch a massive data collection campaign right away. Start with a small but diverse pilot dataset, label it, train a model, evaluate the results, and scale only after the pipeline is working.
Pro tip:
Use data curation tools to identify the most valuable subset of your pilot data. Superb AI reports that automated curation can reduce required labeled data by up to 75%.
2. Think About Edge Cases Upfront
Every computer vision model struggles with data that differs from its training set. Collect edge cases intentionally rather than relying on random sampling.
The MSU dataset includes:
- Dense urban areas with pedestrians and cyclists
- Industrial areas with commercial vehicles
- Forest areas with minimal objects (good for testing false positives)
- Residential areas with narrow streets and parked cars
What to do:
Define your edge-case categories before data collection and make them part of your capture plan.
3. Plan for Domain Shift
Training and deployment conditions rarely match. A model trained on summer daytime data may perform poorly in winter or at night.
Strategies for handling domain shift:
- Collect data across diverse environments and seasons
- Apply domain adaptation techniques
- Use synthetic data to supplement difficult conditions
4. Use Automation Where You Can
Manual data collection and annotation are expensive and slow.
Automate whenever possible:
- Sensor triggering for event-based capture
- Data preprocessing such as face blurring
- Model-assisted labeling before human review
5. Think About Privacy and Compliance
If you’re collecting real-world data, privacy is non-negotiable.
Blur faces and license plates, protect location data, obtain consent when required, and document your collection process.
The Hidden Costs and How to Avoid Them
| Cost Category | What It Really Costs | How to Mitigate |
| Storage | 1 TB/hour at 4.3 GB/s raw data rate | Use compression and storage planning |
| Annotation | Thousands of labeling hours | Use pre-labeling, active learning, and synthetic data |
| Sensor Calibration | Days of specialized work | Automate calibration where possible |
| Data Transfer | Moving terabytes to GPU clusters | Use edge processing when practical |
| Maintenance | Sensor failures and recalibration | Monitor hardware continuously |
Conclusion
Data collection for computer vision can determine the success or failure of a project.
Choose sensors based on your use case—cameras provide visual context, LiDAR delivers accurate depth, radar improves reliability in adverse weather, and sensor fusion combines their strengths.
Build datasets that reflect real deployment conditions, use synthetic data to fill gaps, and invest in proper calibration, synchronization, and annotation.
The key insight
Data quality beats data quantity.
A diverse, well-annotated dataset is far more valuable than a much larger but poorly labeled one. Use curation and active learning to focus labeling efforts, and continuously improve your dataset as new edge cases appear.
The field continues to evolve with richer multimodal datasets and more advanced collection platforms, but the fundamentals remain unchanged:
- Understand your sensors.
- Collect diverse, representative data.
- Build a reliable data pipeline.
Get those fundamentals right, and your models will have the data they need to succeed.